
Winter CMS is a free, open-source content management system based on the Laravel PHP framework. Winter was forked from October CMS in March 2021 due to a difference in open source management philosophies. October is free from the start (I think) and became paid later while Winter is still free until now. For this tutorial, we are going to create a great website out of it locally using XAMPP. To start, you need to download the given files below.
Requirements:
- xampp-windows-x64-8.1.10-0-VS16-installer [download here]
- wintercms [download here]
After downloading XAMPP and Winter CMS zip files, proceed to the tutorials below.
Table of Contents
- XAMPP Installation
- Running XAMPP Control Panel
- Copy and pasting Winter CMS installation folder to XAMPP's htdocs
- Creating database for Winter CMS installation using XAMPP's phpMyAdmin
- Installing Winter CMS website via XAMPP's localhost using web browser
- Accessing Winter CMS website homepage
- Accessing Winter CMS website admin login page
Here are the steps on how to install Winter CMS in XAMPP using your Windows pc
XAMPP Installation
1. Open the XAMPP file that you downloaded. If a question about antivirus appears, just press YES to proceed.

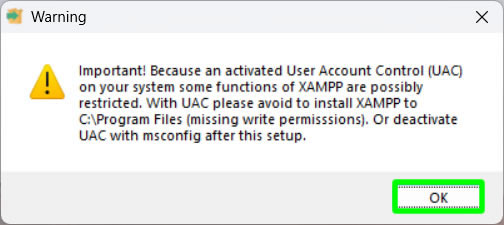
2. If a Warning also appears, just press OK to proceed.
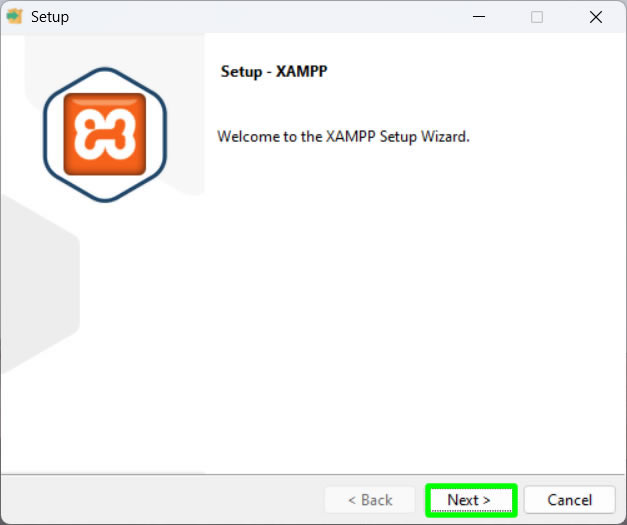
3. In the Setup - XAMPP, just press NEXT to proceed.
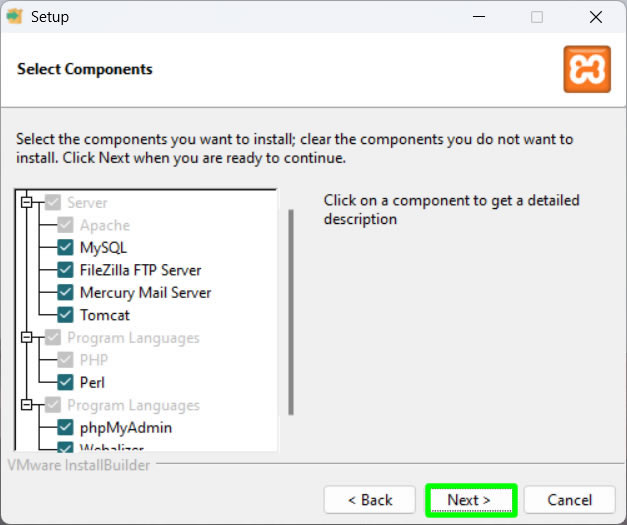
4. Under Select Components, just leave it and press NEXT again.
5. In the Installation folder, do not change it also, just press NEXT to continue.

6. For Language, select English and press NEXT again.

7. We are now ready to install XAMPP. Press NEXT to start.

8. Wait for the installation to finish.

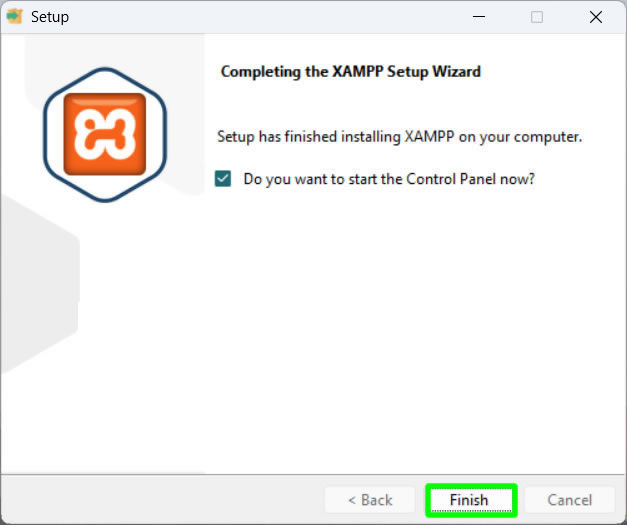
9. When done, press Finish to exit.
Running XAMPP Control Panel
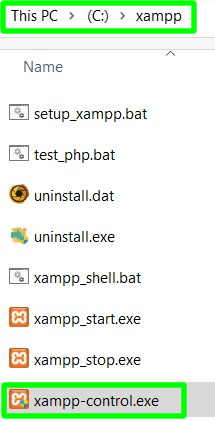
1. To run XAMPP, go to This PC > C drive > xampp > and press xampp-control.exe file.
2. Under XAMPP Control Panel, press the Start buttons for Apache and MySQL.
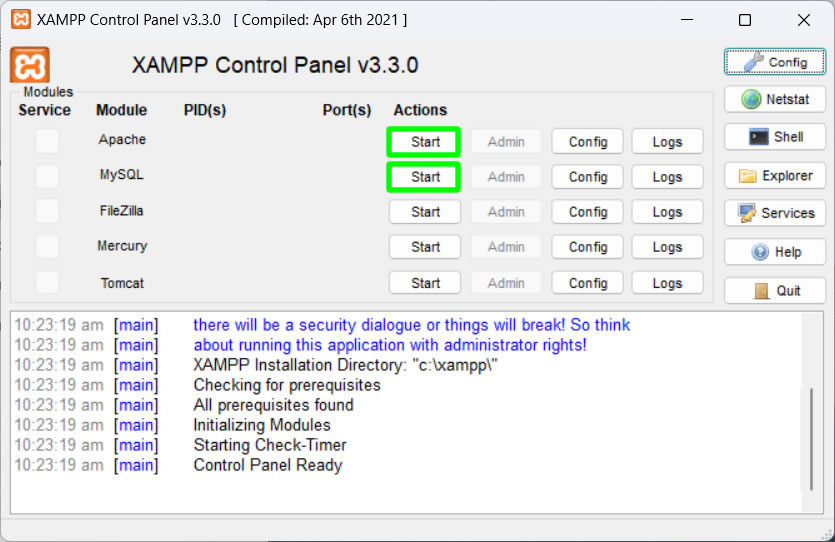
3. Apache and MySQL are both running now if you see two Stop buttons under Actions.

4. If a Windows Security Alert appears, just press Allow access.

Copy and pasting Winter CMS installation folder to XAMPP's htdocs
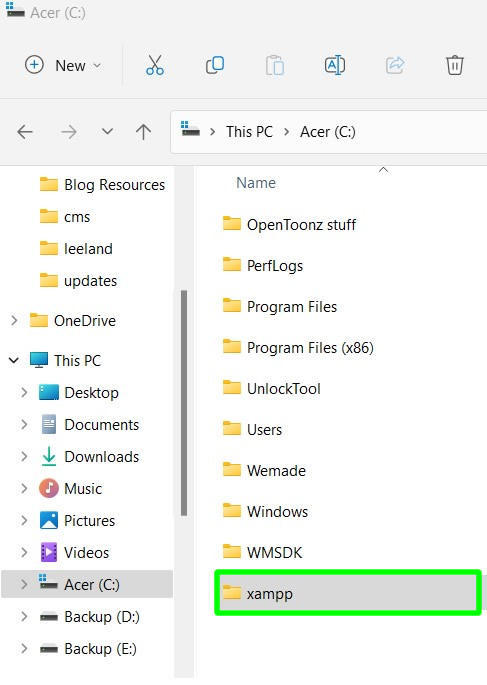
1. Extract the Winter CMS zip file that you downloaded. Rename the extracted folder as "winter". When done, copy your winter folder and go to This PC.

2. Inside This PC, open C drive.

3. Then open xampp folder.
4. Inside xampp, open htdocs.
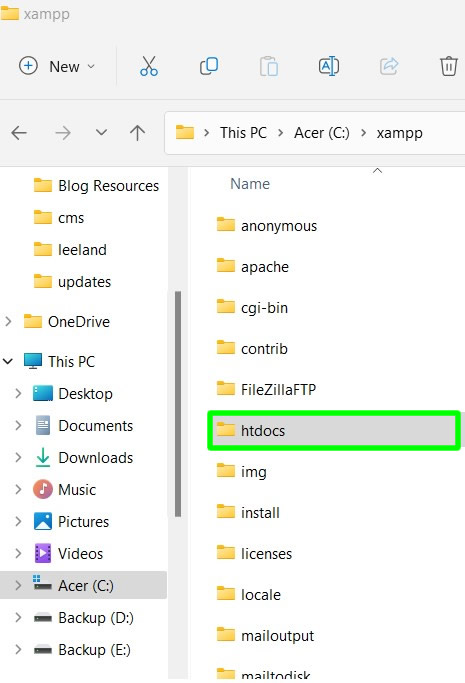
5. Paste your winter folder inside htdocs.

Creating database for Winter CMS installation using XAMPP's phpMyAdmin
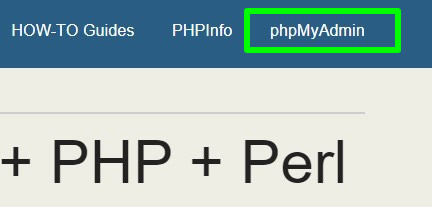
1. We need a database to install Winter. Open your web browser and go to 127.0.0.1 and press ENTER.

2. Inside, click phpMyAdmin.
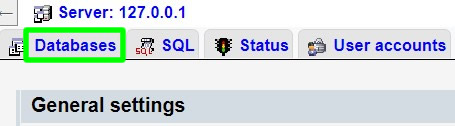
3. Inside phpMyAdmin, click Databases.
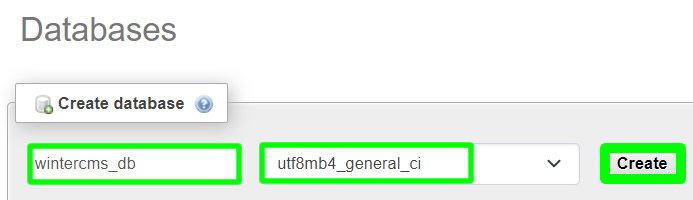
4. In the Create database, name your database as "wintercms_db" and set charset to utf8mb4_general_ci. When done, press Create.
Installing Winter CMS website via XAMPP's localhost using web browser
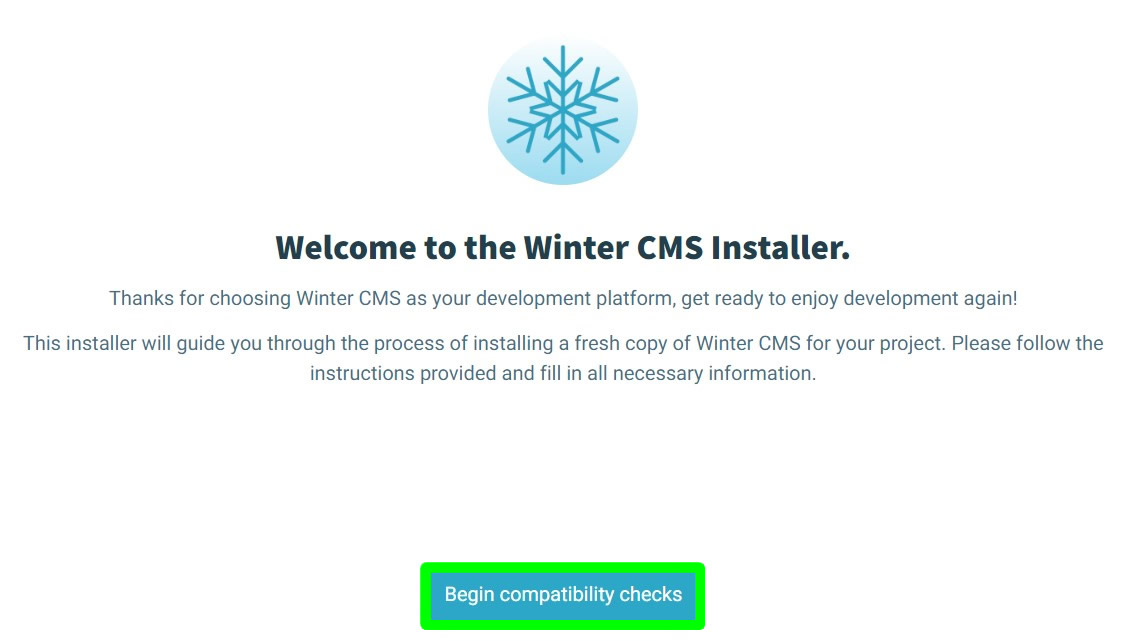
1. We are now ready to install our Winter CMS. Open your web browser again and go to 127.0.0.1/winter/install.html and press ENTER.

2. In the Winter CMS installation welcome page, just press "Begin compatibility checks" button to proceed.
3. In the next page, make sure the API Connection, PHP Version and PHP Extensions are all checked. When done, press Continue Installation button to proceed.

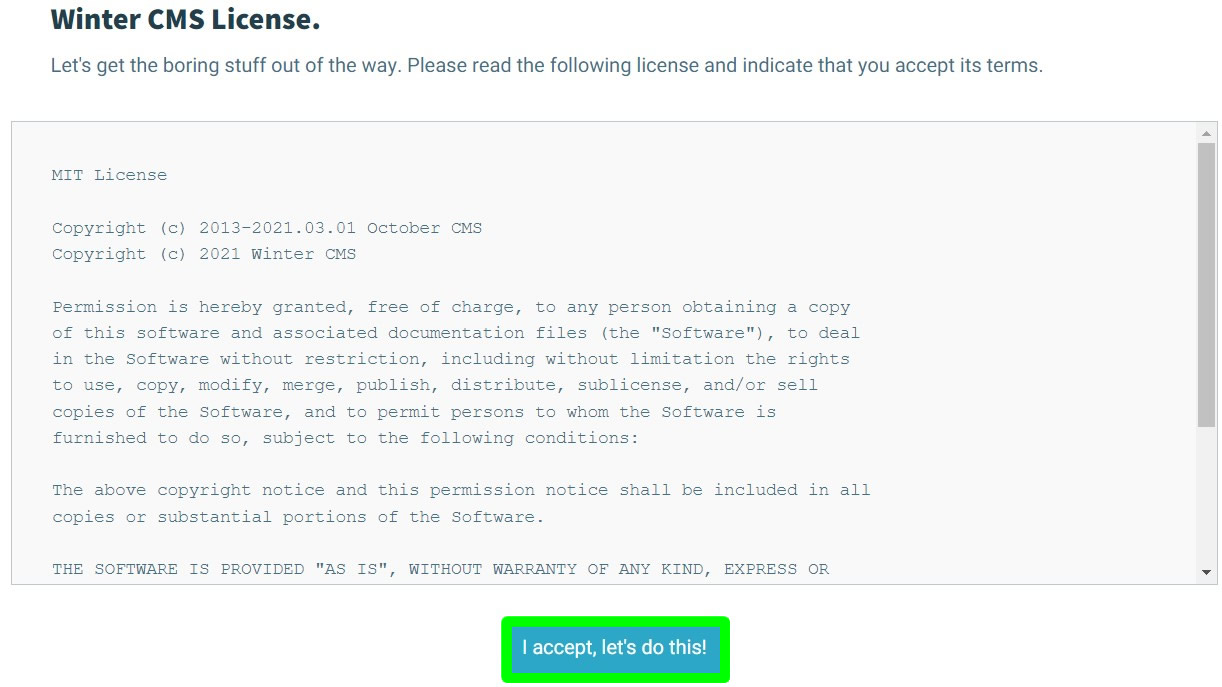
4. Just accept the Winter CMS License in the next page.
5. For Site do the following: Site name - just give your site a name. Site URL - just leave it. Backend Path - you can leave it also (or change it). When done, press Enter database configuration to proceed.

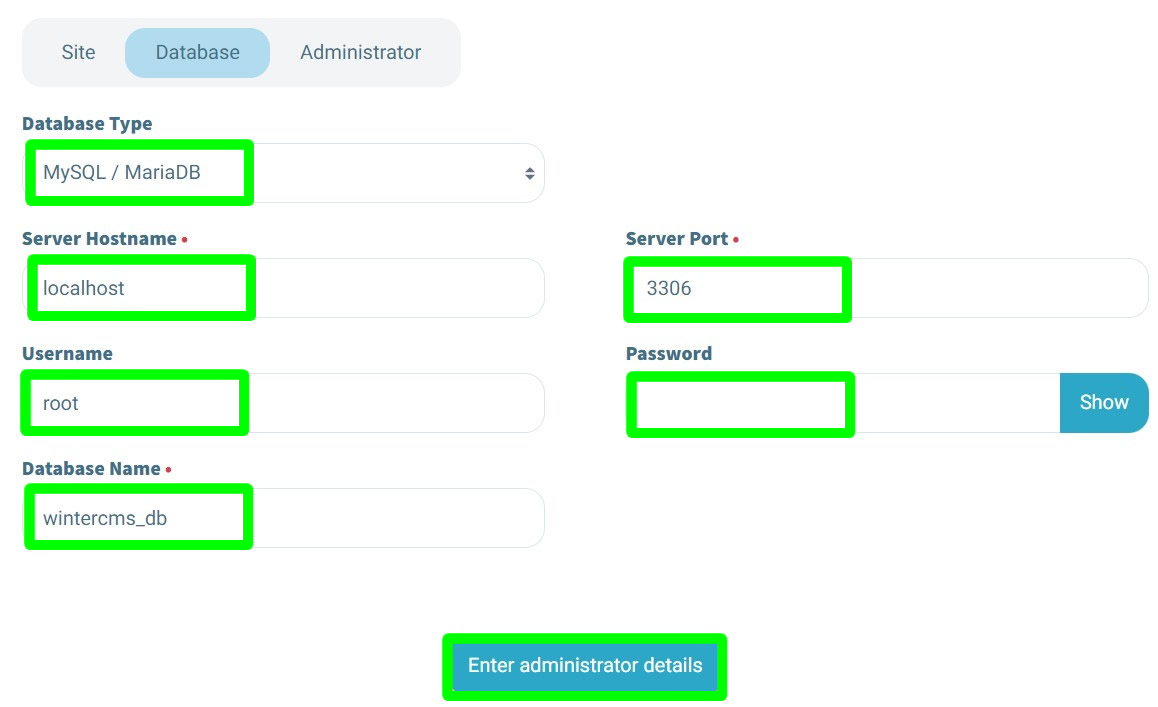
6. For Database, do the following: Database Type - MySQL/MariaDB. Server Hostname - localhost. Server Port - 3306. Username - root. Password - blank or none. Database name - wintercms_db. When done, press Enter Administrator details button to proceed.
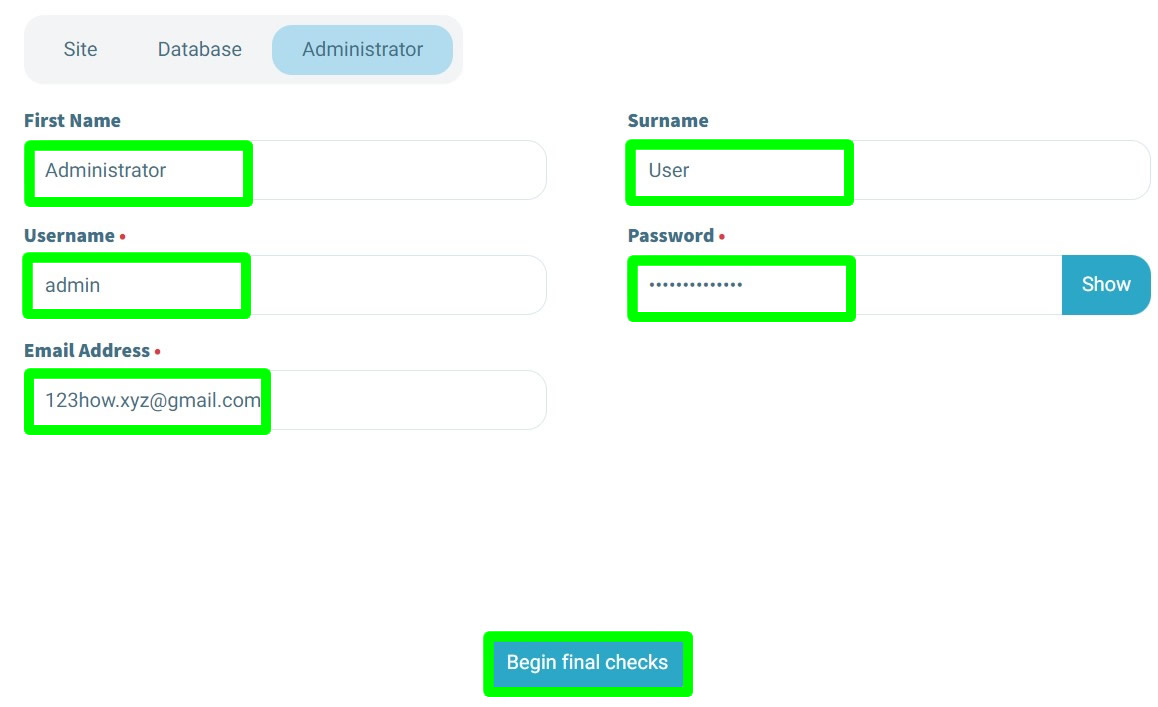
7. In Administrator, do the following: First Name - Administrator. Surname - User. Username - admin. Password - your desired admin password (do not forget it). Email address - enter a valid email. When done, press Begin final check to proceed.
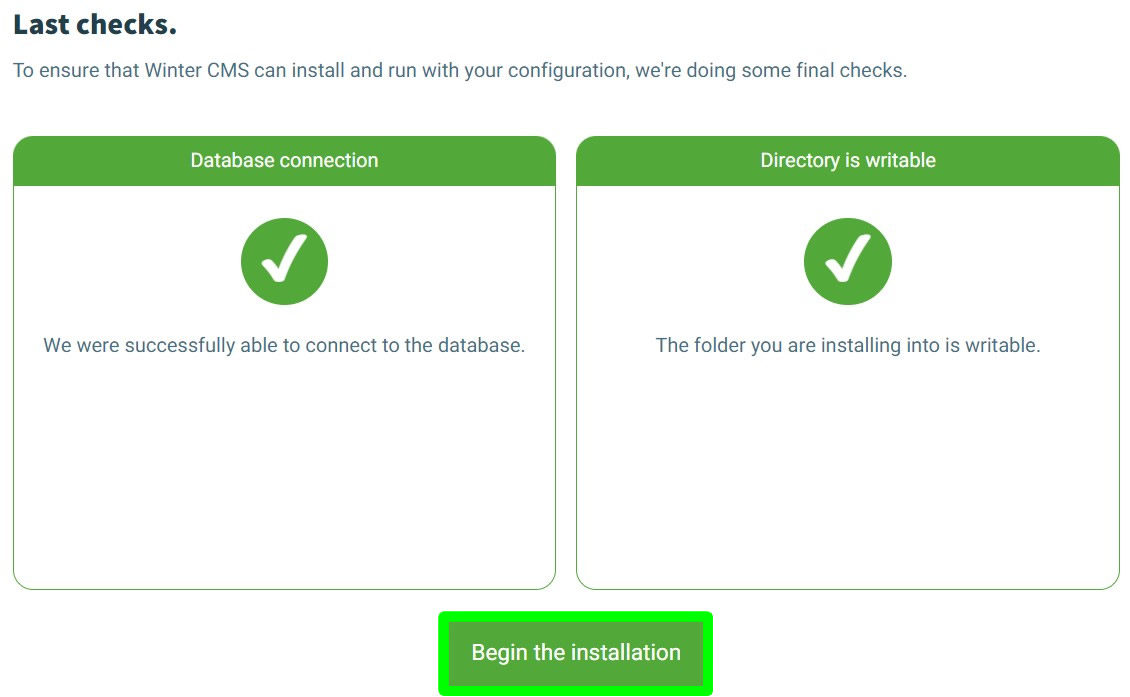
8. For the Last checks, just make sure all are good. When done, press Begin installation.
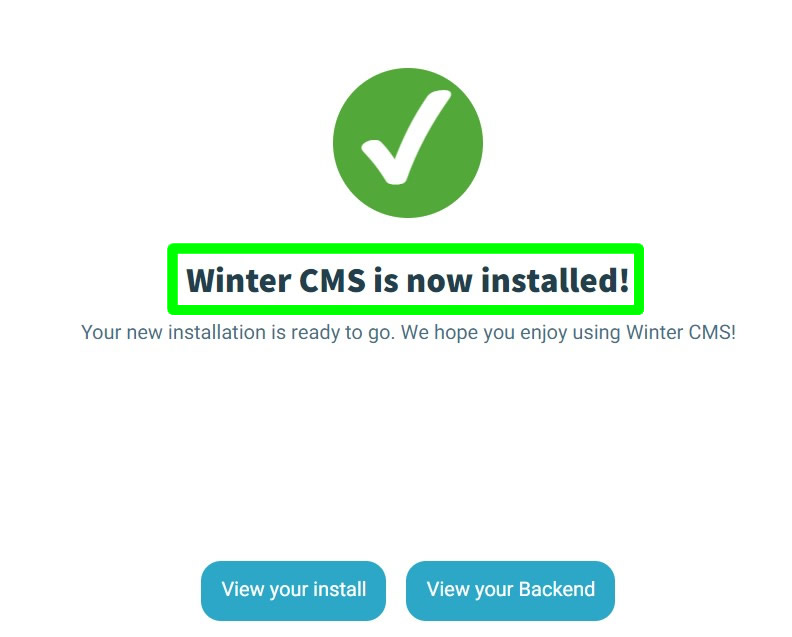
9. Wait for the installation to finish.

10. Done! You have successfully installed Winter CMS website.
Accessing Winter CMS website homepage
1. To access your website, just go to 127.0.0.1/winter or localhost/winter. See the example below of default Winter website homepage.

2. Below is an example of Winter homepage that I already edited.

Accessing Winter CMS website admin login page
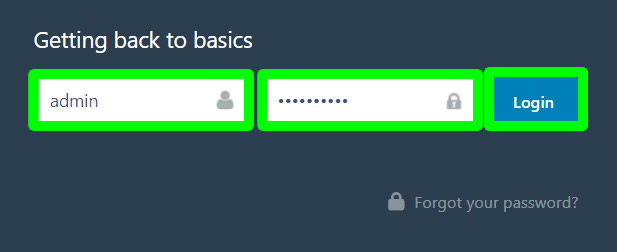
1. To access your admin login page, just go to 127.0.0.1/backend and press ENTER.

2. Login your admin username and password. Press Login to proceed.
3. See the example below of Winter CMS website administration account page.

Thank you for reading this post guys. If you have a question, just leave a comment below. Cheers!

0 Comments
Please comment according to the post topic. Any links and off-topic comments will not be published. Thanks!