
According to Freenom they are the world's first and only free domain provider. Their mission is to bring people online and help countries develop their digital economy. This is definitely true, you can have a free domain from Freenom for the first 12 months, but you need to pay after 1 year for the renewal of your free domain. These domains include .tk, .ml, .ga, .gq, and .cf.
For this tutorial I will show you how to register for an account and purchase a free domain from them. So, without further ado, let's start.
Table of Contents
- Registering for a Freenom account and getting a free domain
- Accessing your free domain
Here are the steps on how to get free domain from Freenom
Registering for a Freenom account and getting a free domain
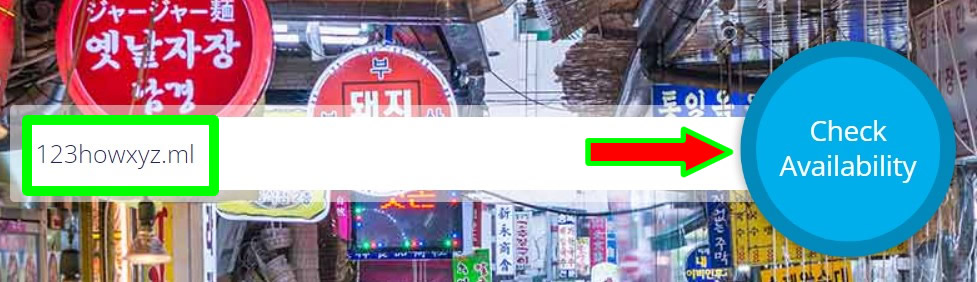
1. Go to freenom.com webiste.

2. Type your desired top-level domain name with its domain extension. The free domain extensions are .tk, .ml, .ga, .gq, and .cf. For this tutorial, I will use the .ml extension. When done, press Check Availability button to proceed.
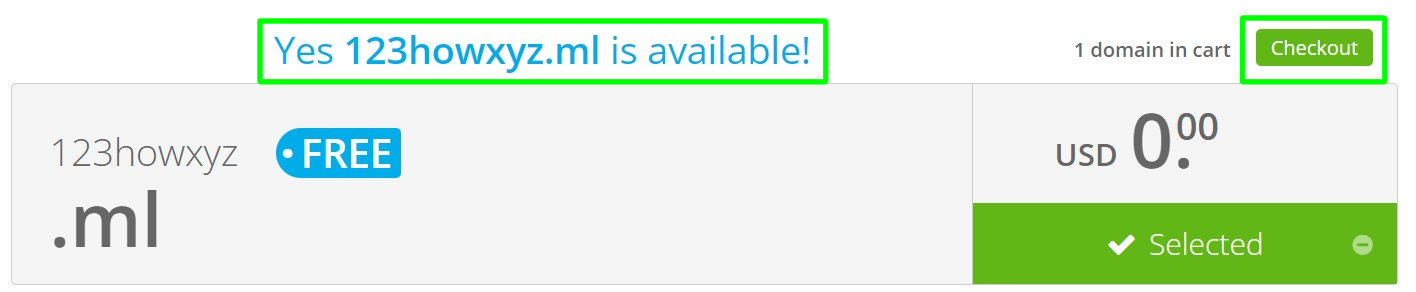
3. If the domain you typed is available, just press Checkout button to proceed.
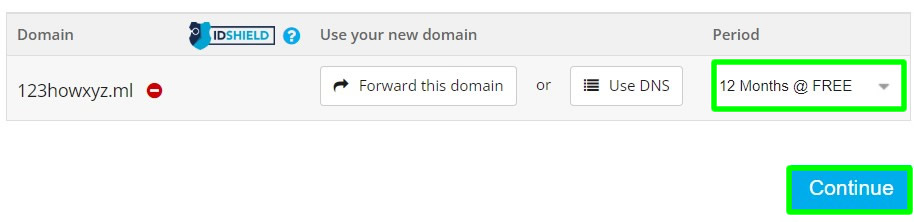
4. In the next page, under Period, change it to 12 months. When done, Continue to proceed.
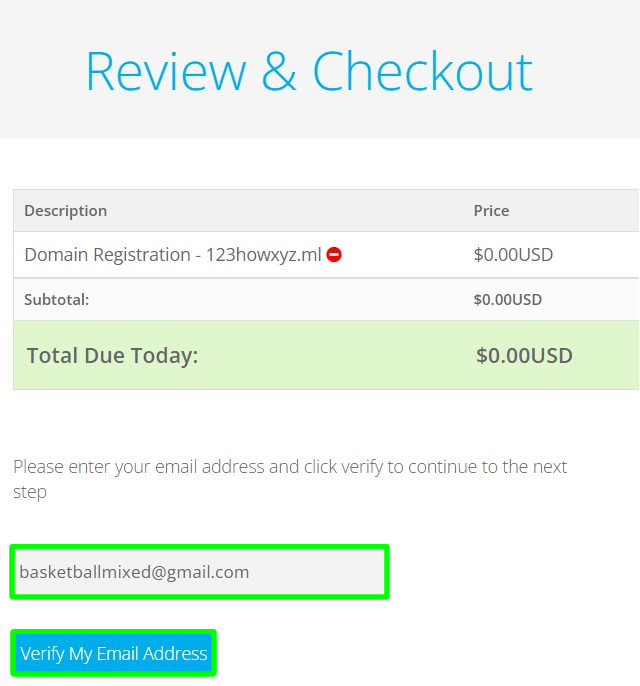
5. In the Review & Checkout, just type a valid email address in the space provided and press the Verify My Email Address to proceed.
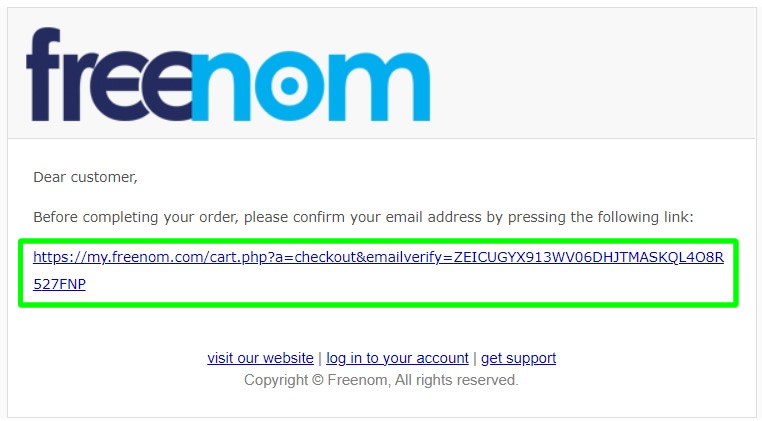
6. A verification link was sent to your email address.

7. Open your email account and open the email from Freenom. Click the verification link to proceed.
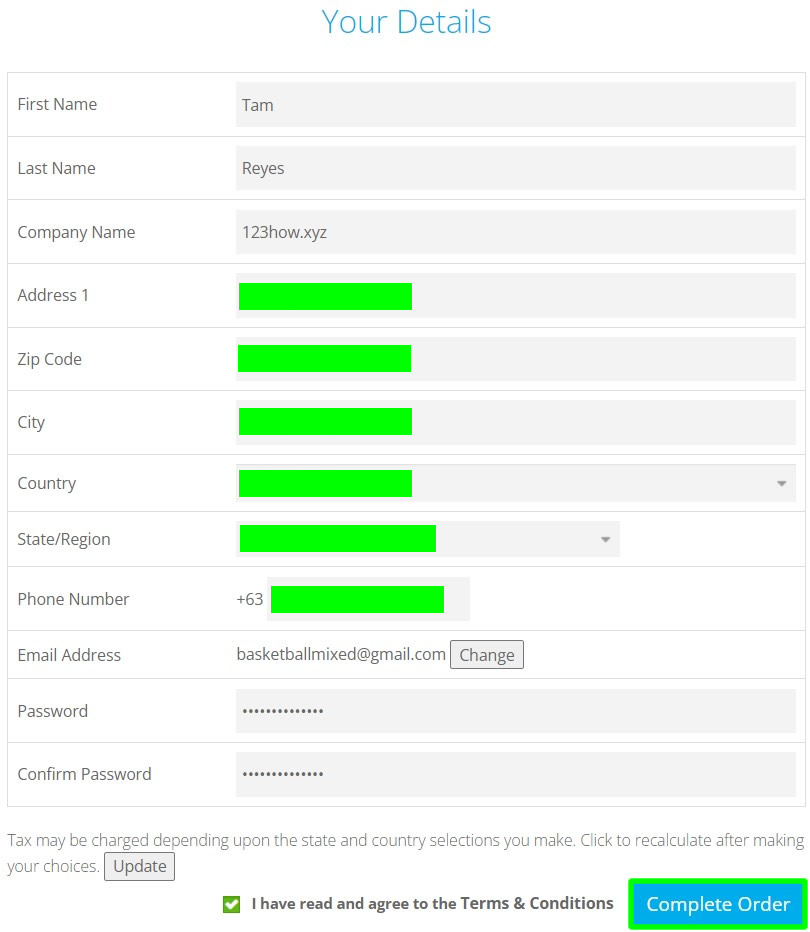
8. In the "Your Details" do the following: First Name - enter your name. Last Name - enter your surname. Company name - enter your company name, if none just type none or not available. Address 1 - enter your street address, etc.. Zip Code - your place postal code. City - your current city, town or municipality. Country - your country. State/Region - your current province or region. Phone number - you can also used a dummy number. Password - type your desired account password (do not forget it). When done, press Complete Order to proceed.
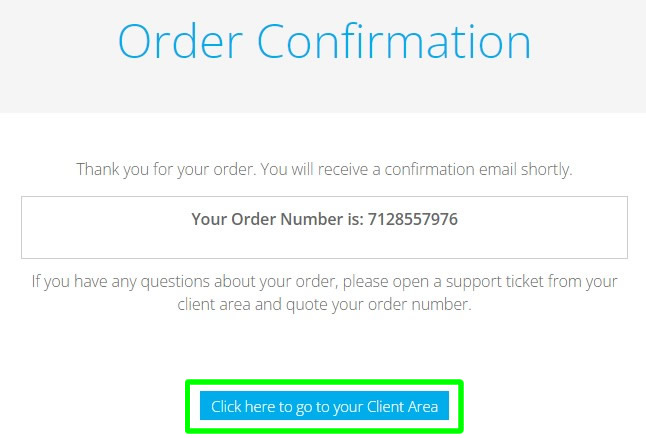
9. Under Order Confirmation, click "Click here to go to your Client Area" to proceed.
Accessing your free domain
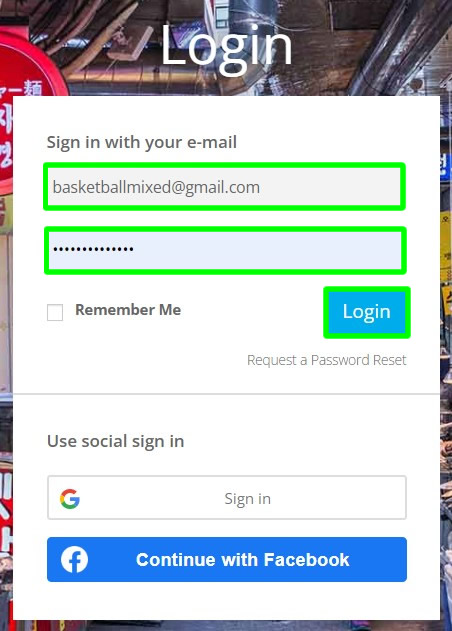
1. If you are already inside your client area then skip this step and proceed to STEP 2. If not, you need to login your Freenom account that you just registered and verified. Just type your email and password and press Login to proceed.
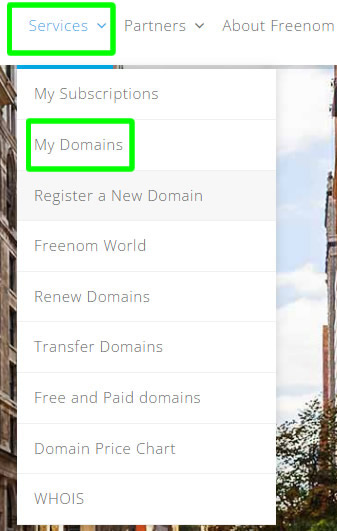
2. Inside, click Services and then press My Domains.
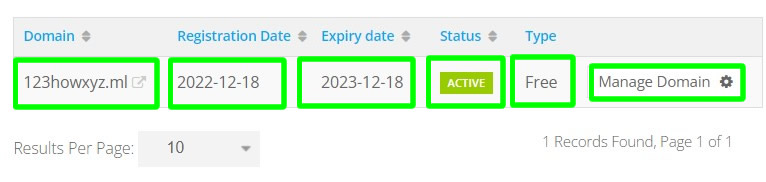
3. You will then see your current free domain name. You will also see there the date it is purchased, its expiration, status, type and the Manage Domain.
Done! You just created a Freenom account and purchased a free domain name from them which is valid for 1 year. If you want to consider redirecting your Freenom domain to Blogger or Blogspot, then, you can follow my additional tutorial here. If you also have a question, just leave a comment below. Thanks!

2 Comments
i am unable to register the domain this is the error i am getting "IMPORTANT NOTICE: Because of technical issues the Freenom application for new registrations is temporarily out-of-order.
ReplyDeletePlease accept our apologies for the inconvenience. We are working on a solution and hope to resume operations shortly.
Thank you for your understanding.
"
i am very sorry about that, i think, freenom website is experiencing some downtime. because I also tried to access their website but there is always a server error. maybe you can try again later.
DeletePlease comment according to the post topic. Any links and off-topic comments will not be published. Thanks!