
As a new Blogger who just started out your Blogging career, it is best to first host your blogs using the Blogger platform which is 100% free. And when you already made enough articles or posts, it is now the time to redirect or forward your Blogspot into a top-level domain. For this tutorial, I will show you how to easily redirect your Blogspot into a Namecheap domain.
Namecheap is an ICANN-accredited domain name registrar providing domain name registration and web hosting based in Phoenix, Arizona, US. Namecheap is a budget hosting provider with 11 million registered users and 10 million domains. I used Namecheap for all my Blogspots because it is really cheap and because of its reliability. Its top-level domain has unlimited bandwidth, meaning, you don't have to worry if your visitors get really big, your Blogspot won't go down suddenly because it exceeded the allotted bandwidth.
To be able to do this tutorial, I assume that you already purchased a top-level domain from Namecheap
and created your Blogspot that will be redirected or forwarded to that domain you purchased. By the way, I also included some steps below for creating a new Blogspot that you will be using to point your domain to. Let's get started!
Here are the steps to be able to redirect your Blogger to a custom domain Namecheap.
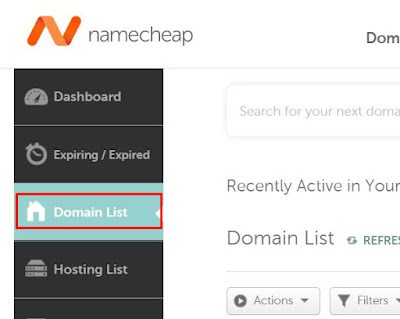
✅ Login your Namecheap account. Click Domain List.
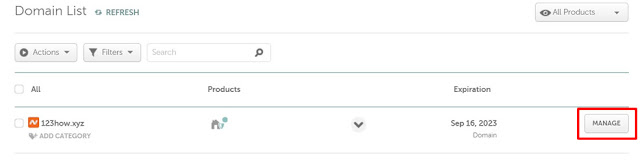
✅ Select the domain that you want to point to your Blogspot and press Manage.
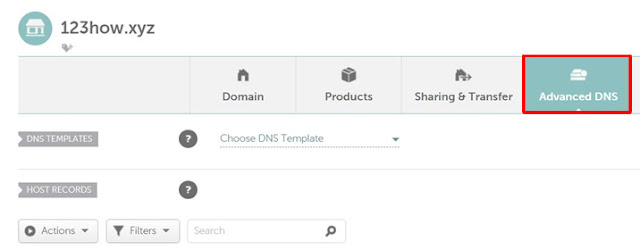
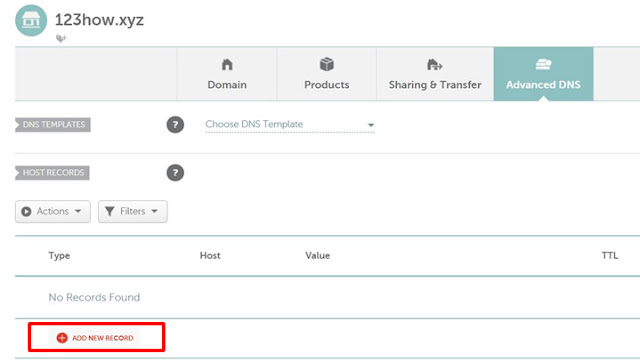
✅ Find and press Advanced DNS to proceed.
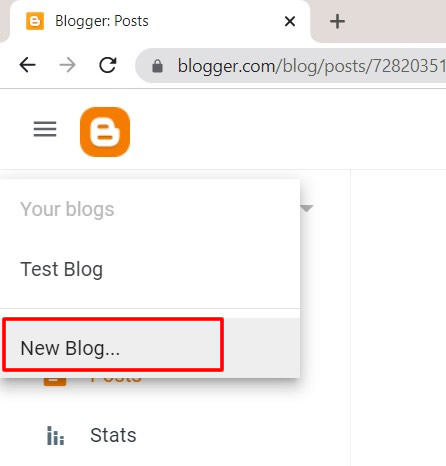
✅ Back to Blogger. Create a New Blog.
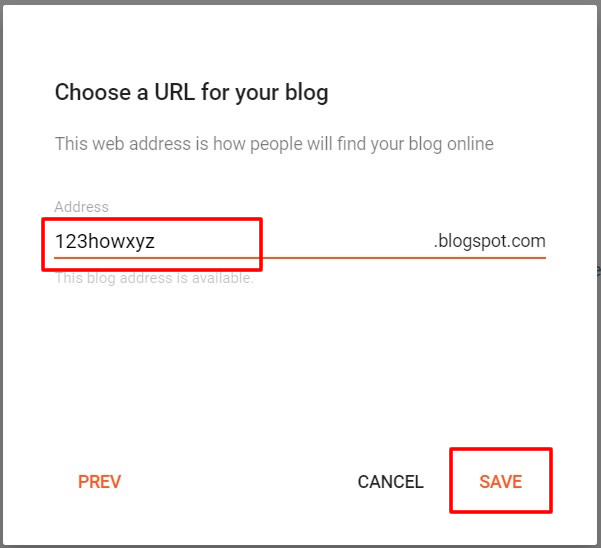
✅ Name your blog and press NEXT.

✅ Choose a valid URL for your blog and press Save to confirm.
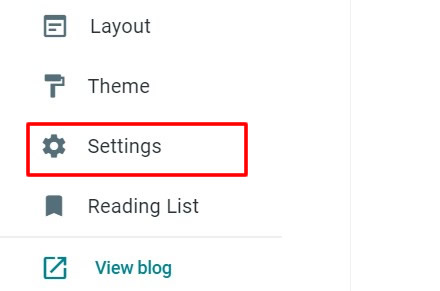
✅ When your Blogspot is already created, go to its Settings.
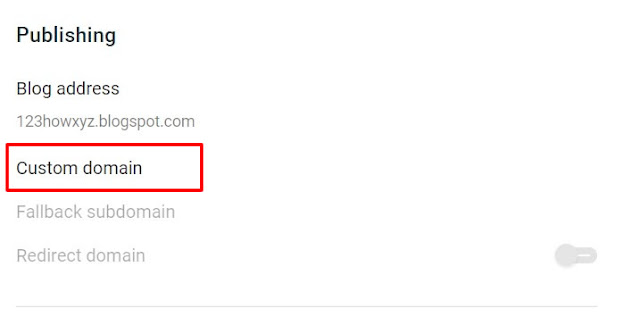
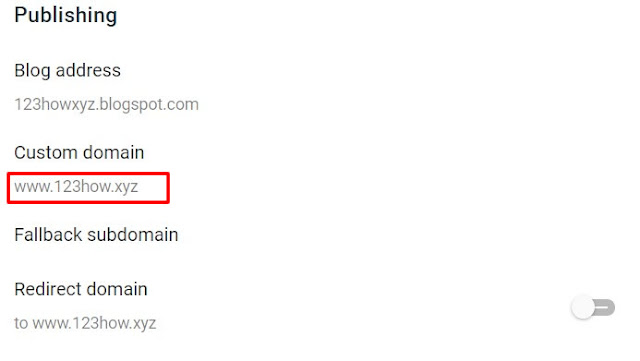
✅ Find the Publishing section and press Custom domain.
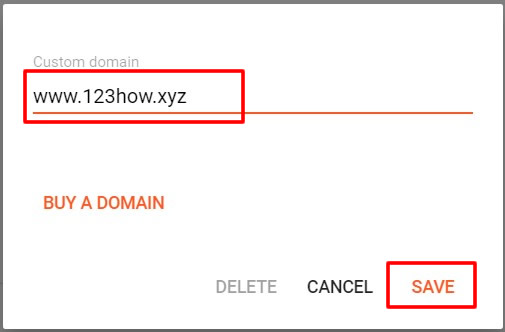
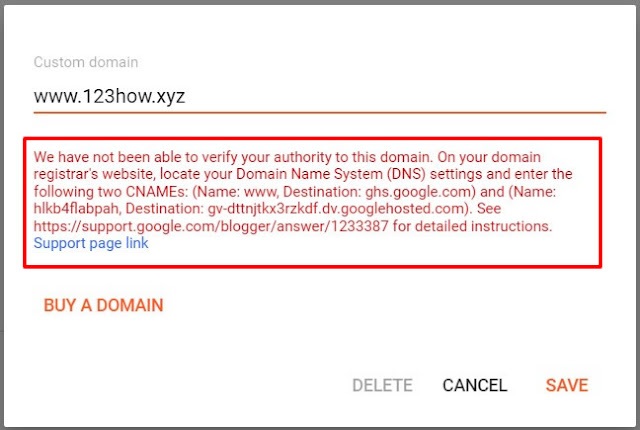
✅ In the custom domain type the domain name that you purchased on Namecheap. Make sure it has the www in the beginning. Press Save to confirm.
✅ Suddenly, a very long message will popup under the custom domain that you just typed.
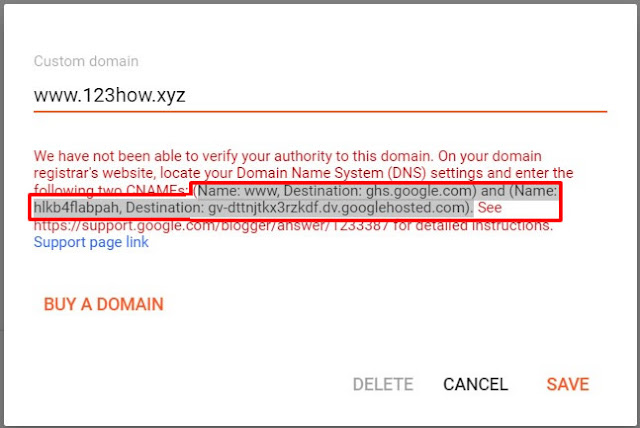
✅ I selected the information that you needed (see image below). You will see almost the same Name and destination for your own created Blogspot.
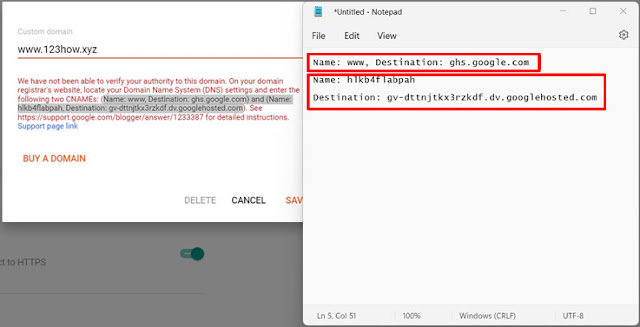
✅ What I did, is I copied these information inside a Notepad and segregated it to see it more clearly and to easily copy and paste it later inside the Advance DNS.
✅ Back to Advanced DNS, delete any record that you will see there and you should have a blank record. Now, press ADD NEW RECORD button.
✅ For the first record select CNAME Record for Type, www for host, ghs.google.com for Value, and 30 min for TTL and press Check button to Save it. www - it came from your Blogger record, and ghg.google.com - also came from your Blogspot
✅ For the second record select CNAME Record also for the Type, for the Host copy and paste the second Name that you will inside your Blogger custom domain. For the Value copy the destination (also from Blogger), it always starts with gv- and ended with googlehosted.com. For the the TTL select 30 min. Press the check button to save your second CNAME Record.
✅ For the third one, select URL Redirect Record as type, type @ for host and type http://yourdomain.com/ as the value. Do not alter the Unmasked beside it. Press the Check button to save the third record.
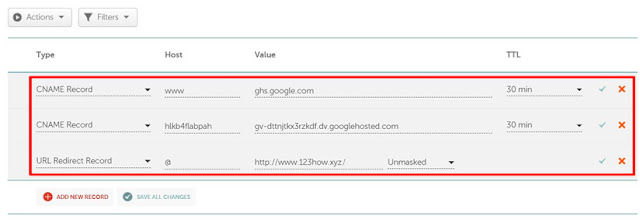
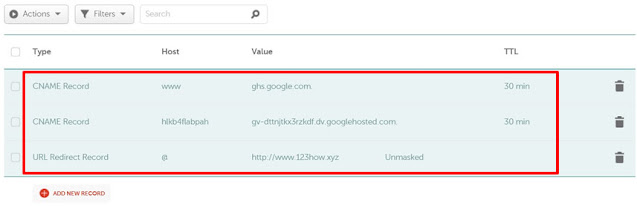
✅ When done, you will see the same records as the image below.
✅ Back to Blogger Custom domain, click Save. If all is done correctly, you are going to successfully save your Custom domain. If not, you will see an error message.

✅ If you successfully saved your Custom domain, you will now see under Publishing > Custom domain your purchased domain name.
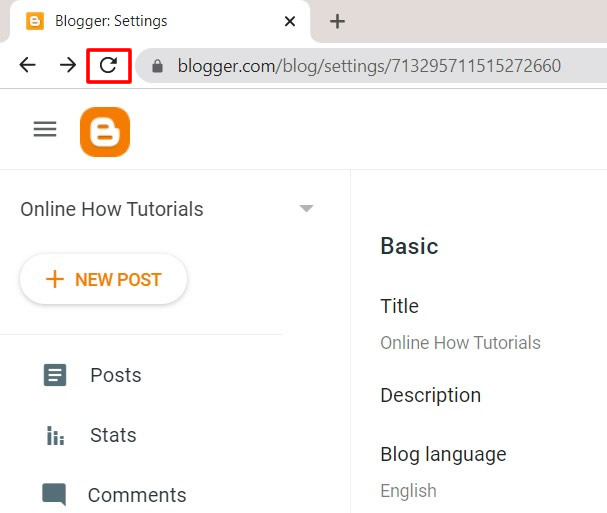
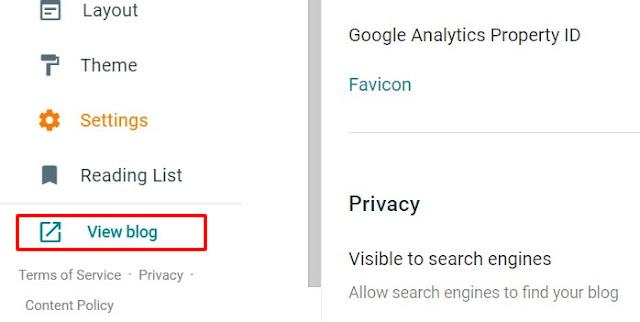
✅ Now, press the refresh button of your internet browser.
✅ After refreshing the page, press View Blog.
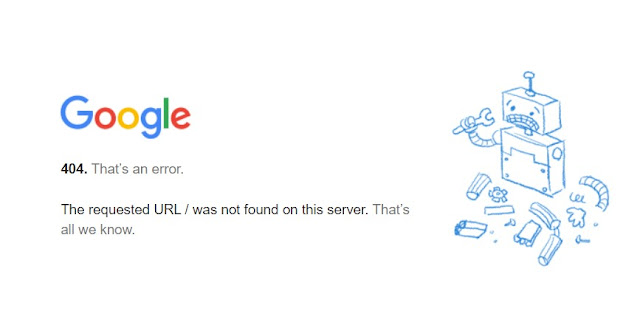
✅ It is very normal that you will see error below. The requested URL / was not found on this server. That's all we know.
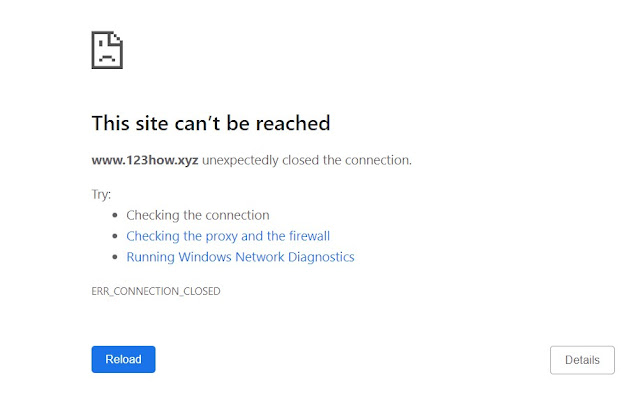
✅ You might also see another error like the error below that This site can't be reached. Do not worry, the process of redirecting your purchased domain name to your Blogspot is not done instantly it will take time, about 15 to 30 minutes.
✅ Assuming that the 15-30 minutes is done, you will now be able to view your domain name inside your Blogspot. But it is not yet secured. Meaning, the https function inside your Blogger is not enabled.

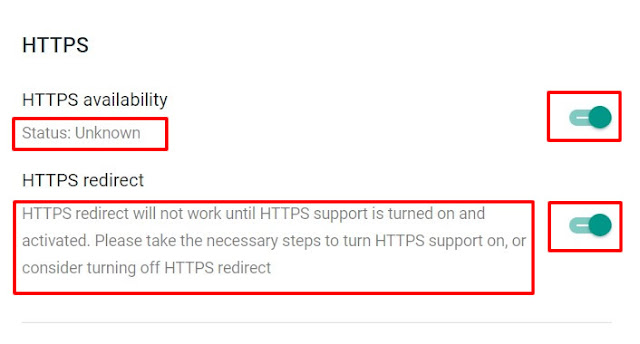
✅ Back to Blogger, go to Settings of your Blogspot and find HTTPS section. Just enable the two buttons that you will find there. The HTTPS availability and the HTTPS redirect. Upon enabling the two, you will see under HTTPS availability that the Status is Unknown. For the HTTPS redirect it says HTTPS redirect will not work until HTTPS support is turned on and activated. Please take the necessary steps to turn on HTTPS support on, or consider turning off HTTPS redirect.
All you need to do now is wait again patiently because the process is automatic and propagating behind the background. You may have to wait for another 15-30 minutes because during this time you won't be able to view your website or Blogspot again.
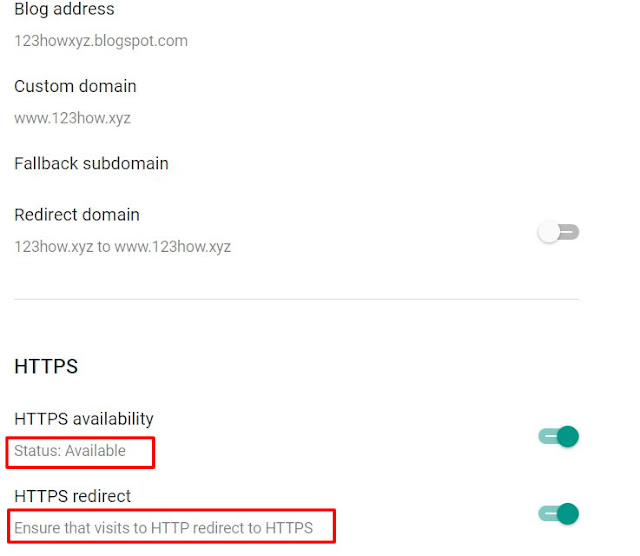
✅ Assuming that the 15-30 minutes is done, you can refresh your Blogger again and see the status of HTTPS availability and HTTPS redirect. It should be Available for HTTPS availability. And Ensure that visits to HTTP redirect to HTTPS for the HTTPS redirect. Seeing this, you website is now live and anyone can view it online.
✅ Done! You have successfully redirected or forwarded your custom domain to your Blogspot subdomain.
✅ If you have questions, just leave a comment below. Hopes this helped you guys. Cheers!

0 Comments
Please comment according to the post topic. Any links and off-topic comments will not be published. Thanks!