
If you are using Windows 11, I am really sure that it is a little frustrating that its Start Menu Recommended portion is eating half the space of it. For this tutorial, I will show you how to remove it and make it just a plain and classic Start Menu.
For this post, we will be downloading this amazing free program called StartAllBack. This program will do all the works to make out Start Menu or even our taskbar back to its former look or theme.
StartAllBack also has the option to make your Windows 11 theme looks like Windows 10 or Windows 7. And you can even make the centered Start Menu logo back its classic position using this
free software. Please see the steps below for more details.
Here are the steps on how to remove Recommended in Windows 11 Start Menu and revert back your theme to Windows 10 or even Windows 7.
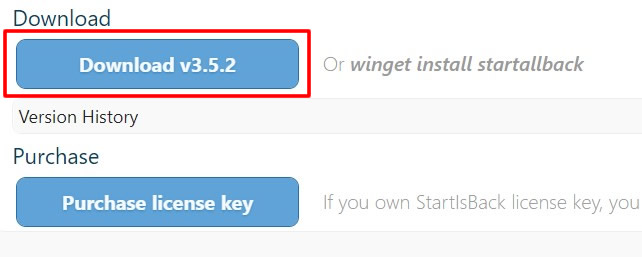
✅ Visit the StartAllBack website and download the program.
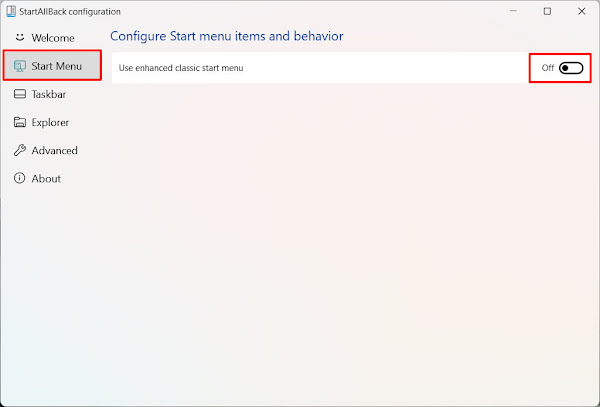
✅ After downloading, open the StartAllBack_3.5.2_setup.exe to open it. In the StartAllBack Configuration, click the Start Menu tab. You will see there the "Use enhanced classic menu." If it is turned off then, you just need to turn it on.
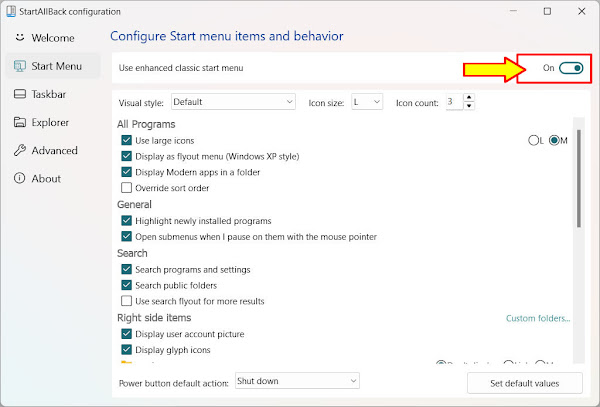
✅ Now, that is turned on, you will see different settings that you can tweak and have for your Windows 11 Start Menu. But, you can leave the settings as it is for now.
✅ Now, click the Windows 11 logo and the Recommended section of it is removed and gone.
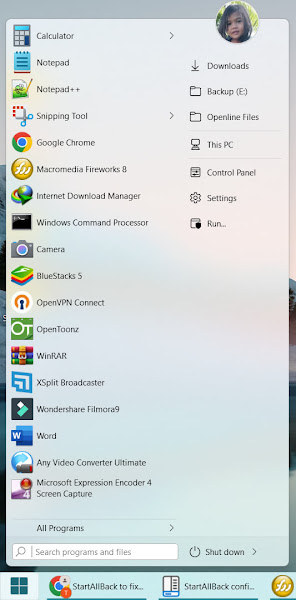
✅ Done! You have successfully removed the Recommended section of your Windows 11 Start Menu
If you have a question, please leave a comment below. And also if you wanted to have a full-version of StartAllBack, you can email us using the Contact Us page. The trial version of StartAllBack is only valid for 100 days or over 3 months. Cheers!

0 Comments
Please comment according to the post topic. Any links and off-topic comments will not be published. Thanks!