
For this post, we are going to install PmWiki in a web hosting for free. I also have a tutorial on how to install PmWiki locally using XAMPP here.
Now, to be able to install PmWiki online, we need a domain or just a subdomain. But don't worry, to be able to have one, the tutorial is already below. You just need to follow it. But first, download the PmWiki zip file and unzipper.php file below. These are the required files for the installation of our website. I also provided the download links already.
Requirements:
- pmwiki-2.3.15, [download here]
- unzipper.php [download here]
After downloading the files, continue doing the tutorials below.
Table of Contents
- Registering for a Free Web Hosting Account with Cpanel
- Creating a free domain or subdomain in our Web Hosting Account
- Uploading PmWiki and unzipper.php files using Web Host File Manager
- Extracting the PmWiki zip file using unzipper.php
- Installation of PmWiki manually
- Accessing PmWiki website homepage
- Accessing PmWiki website admin account
- Editing PmWiki config.php file to change admin password, logo, site title
Here are the steps on how to install PmWiki manually in a web hosting account free
Registering for a Free Web Hosting Account with Cpanel
1. Go to infinityfree.net website.

2. Inside, click "Sign Up Now".

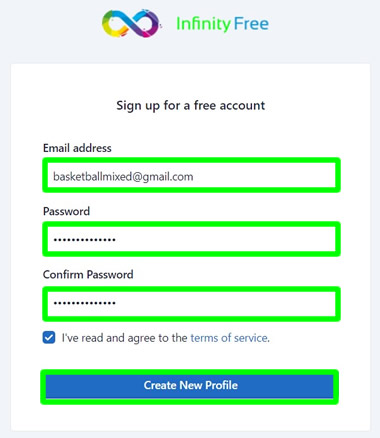
3. Under "Sign up for a free account" do the following: Email address - enter a valid email. Password - your desired account password (do not forget it). Confirm your password and check the "I've read and agree...". When done, click the Create New Profile to proceed.
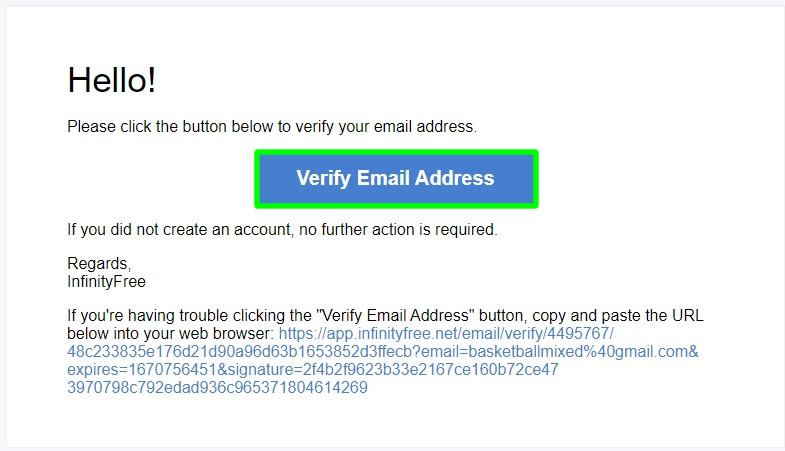
4. Verify your registration.

5. Open your email account. Find the email from infinityfree and click the verification button or link.
6. You have successfully created a free web hosting account.
Creating a free domain or subdomain in our Web Hosting Account
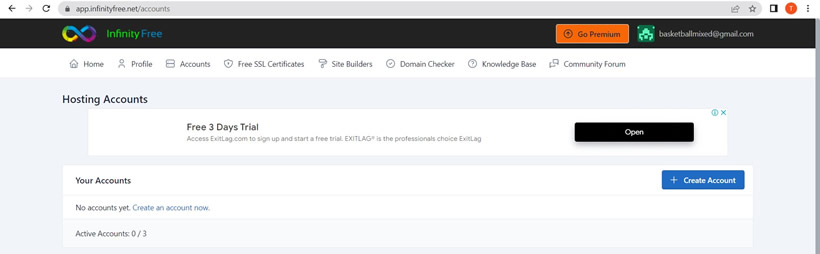
1. We are now going to create a free domain (subdomain) inside our web hosting account. Click +Create Account.
2. Under "Choose a Domain Name" do the following: Domain Type - Subdomain. Subdomain - name your subdomain. Domain Extension - select your desired extension. When done, press "Check Availability" button to proceed.

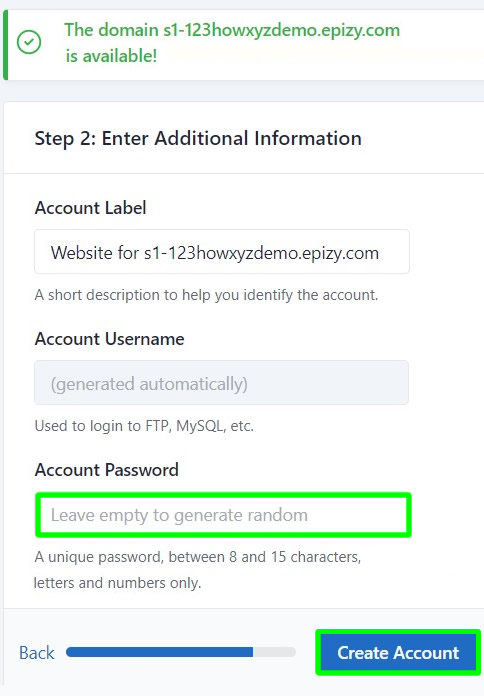
3. Under "Enter Additional Information" just enter a password or you can leave it blank. When done, press Create Account to continue.
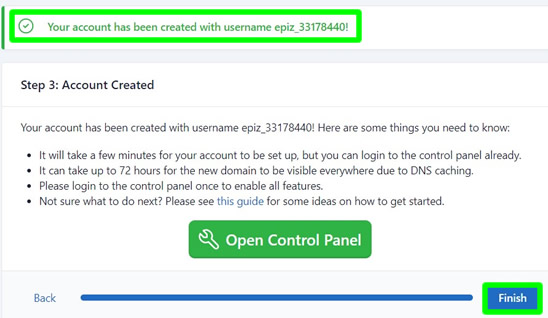
4. Under "Account Created" just press Finish.
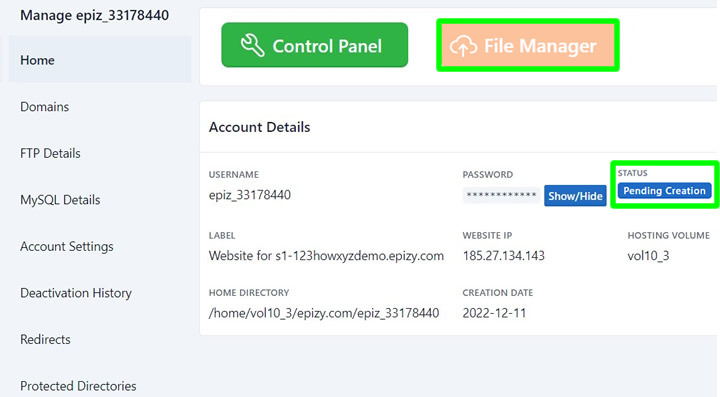
5. Your account is now under "Pending Creation". Wait for 2 to 5 minutes and it will be automatically activated.
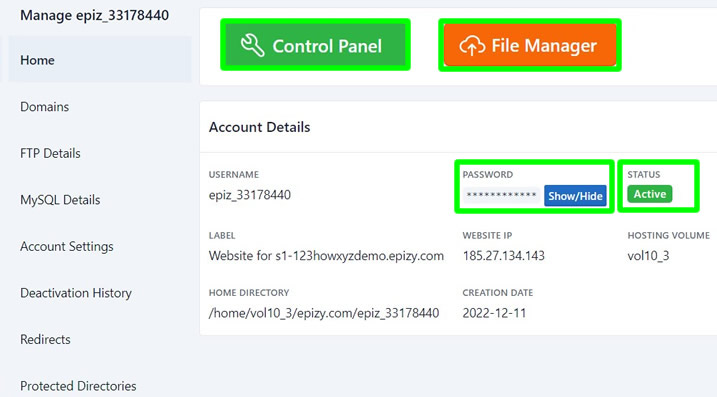
6. After a couple of minutes, just refresh or reload your page and see the status. If it is already "Active", then your account is now ready for the next step.
Uploading PmWiki and unzipper.php files using Web Host File Manager
1. We are now uploading the PmWiki zip file using File Manager. Click your File Manager.

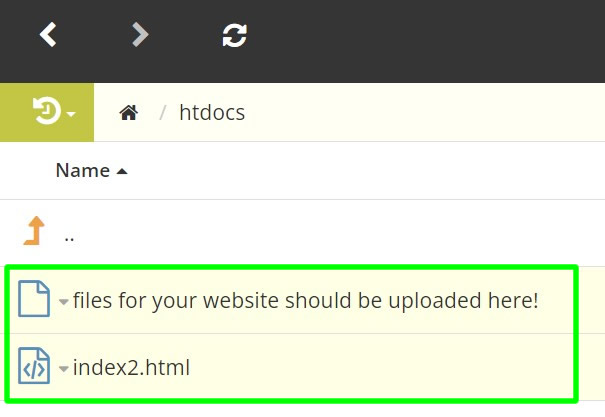
2. Inside, open htdocs folder.
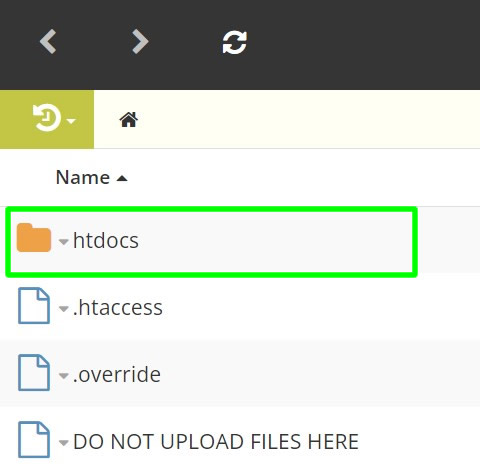
3. Inside htdocs, delete the 2 files that you will see there.
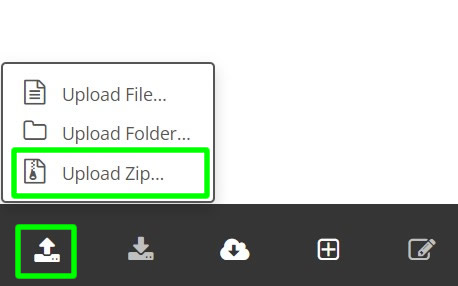
4. After deletion, click the Upload icon and press Upload Zip.
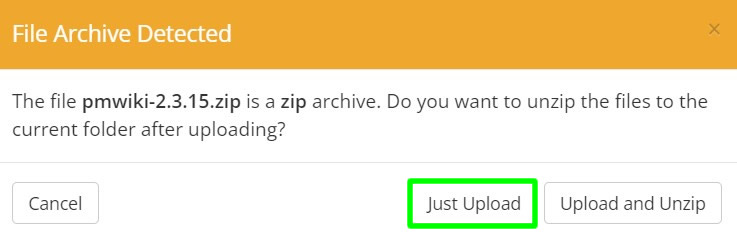
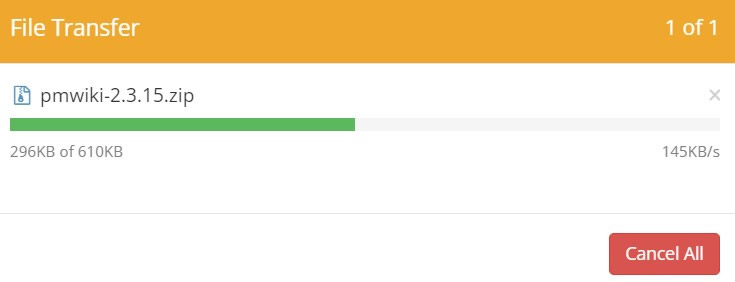
5. Browse for the pmwiki-2.3.15.zip file and press Just Upload to proceed.
6. Wait for the upload to finish.
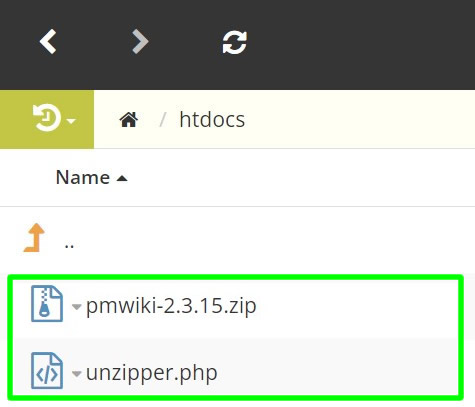
7. When done, you should see the pmwiki zip file inside your htdocs folder.

8. Click Upload again and then select Upload File.

9. Browse for the unzipper.php file that you also downloaded earlier and wait for the upload to finish.

10. When done, the PmWiki zip file and unzipper.php file should be now inside your htdocs folder.
Extracting the PmWiki zip file using unzipper.php
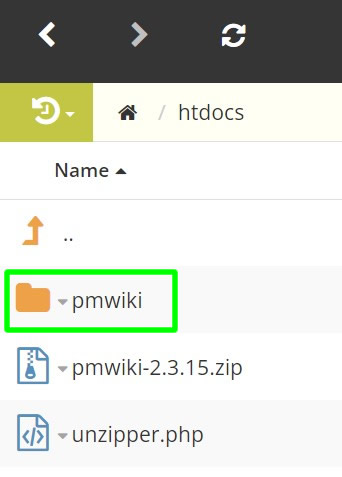
1. We are going to extract or unzip the PmWiki zip file using unzipper.php. Click Accounts.

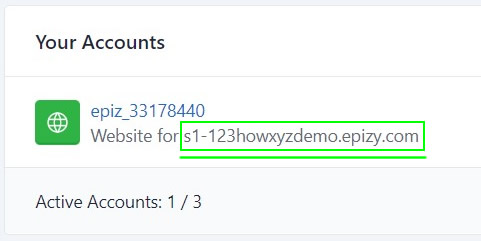
2. Under "Your Accounts", you will see there your (sub) domain URL or link. Copy that link.
3. Paste your link in your address bar and add /unzipper.php next to it (see image below). When done, press ENTER to fire up the Archive Unzipper.

2. Inside Archive Unzipper, select your pmwiki zip file and type "pmwiki" in the "Extraction path". When done, press Unzip Archive to start the extraction.

3. Your pmwiki zip file is now extracted.

4. Back to your htdocs folder, click Refresh.
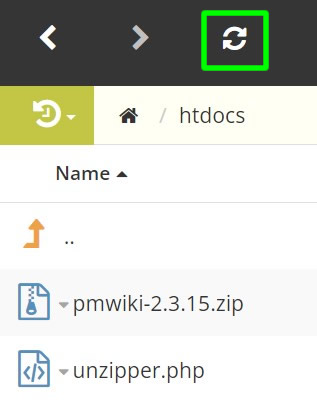
5. You should see your "pmwiki" folder there now.
Installation of PmWiki manually
1. Copy your subdomain link again and paste it in your address bar and add /pmwiki/pmwiki.php next to it. When done, press ENTER to fire up the PmWiki installation page.

2. Done! You just instantly created your PmWiki website. Take note: I already edited the config.php file for the this tutorial. You will need to edit it manually later to change your Wiki Title, and admin password as well as your Wiki logo. The tutorial is also found below.

Accessing PmWiki website homepage
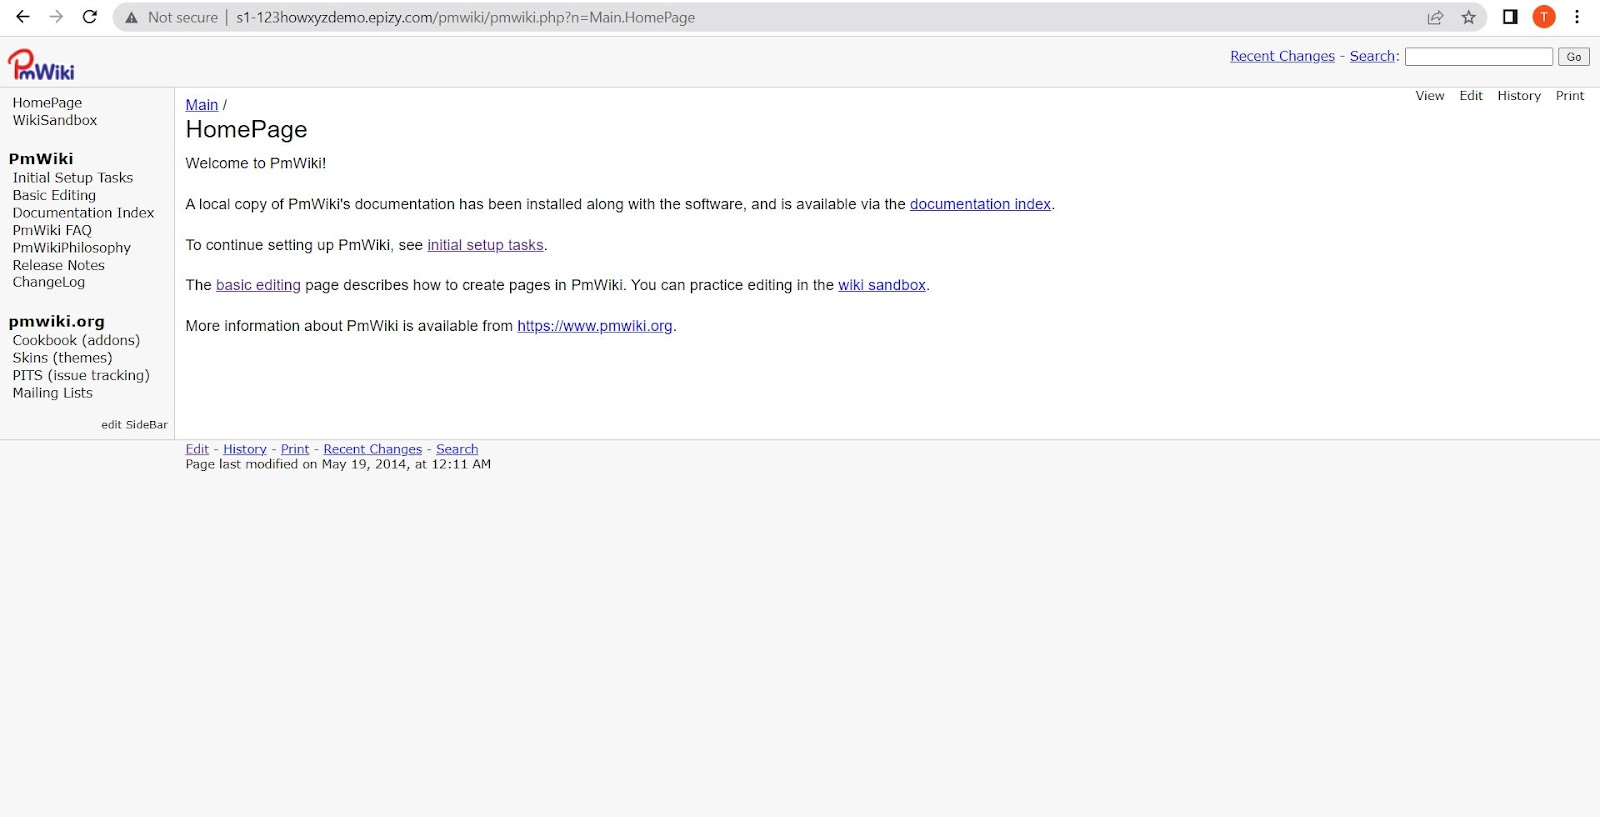
1. To access your PmWiki website homepage, just go to your-link/pmwiki/pmwiki.php. Below is an example of PmWiki default homepage.
2. Below is an example of PmWiki homepage that I already edited. It has its own logo and homepage post.

Accessing PmWiki website admin account
1. To access your PmWiki website admin login page, just go to your-link/pmwiki/pmwiki.php?n=SiteAdmin.SiteAdmin. Below is an example of your admin login page.

2. Enter your admin account password. The password for now is adminpasswordhere. When done, press OK to proceed.

3. Below is an example of your PmWiki website administration account page.

Editing PmWiki config.php file to change admin password, logo, site title
1. To change your PmWiki logo, admin password and site title, you need to edit your config.php file. Go to htdocs > pmwiki > local > find and edit config.php file.

Important Line of Codes
- $WikiTitle = "YOUR WIKI TILE IS HERE";
- $PageLogoUrl = "URL OF YOUR OWN LOGO";
- $DefaultPasswords['admin'] = pmcrypt('youradminpassword');
- $EnableUpload = 1;
- $DefaultPasswords['upload'] = pmcrypt('youradminpassword');
Thank you for reading this post guys. If you have a question, just leave a comment below. Cheers!

0 Comments
Please comment according to the post topic. Any links and off-topic comments will not be published. Thanks!