Changing the Bands of your Globe at Home Prepaid WIFI device will significantly increase your current poor signal into a better one. For my device, the best one is the
band3 which gives my Globe at Home signal strength of up to 4 to 5 bars. Other bands gives me just low signal down to no signal at all.
It is required that you test which band is the best for your device also for better internet speed. And to be able to do this, you need to access your Globe at Home admin. See the full tutorial below to be able to do so.
Also read:
How to change Bands in Globe at Home to improve network signal
👉 First, you need to login and access your Globe at Home admin. To do this, follow first this tutorial:
How to access/login Globe at Home Admin
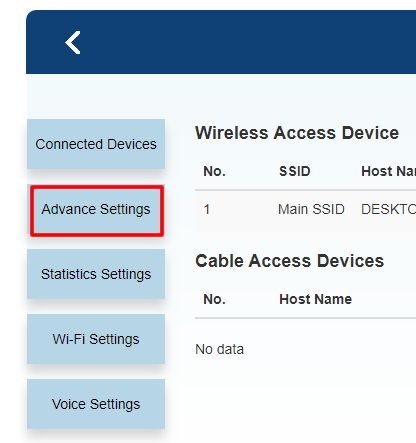
👉 Assuming that you are already inside your admin page, press the
Device Settings tab.
👉 Now, press
Advance Settings.
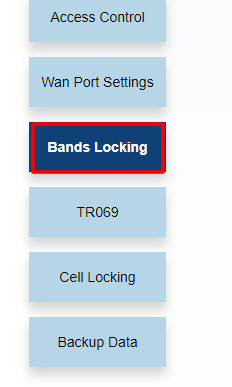
👉 The, press
Bands Locking.
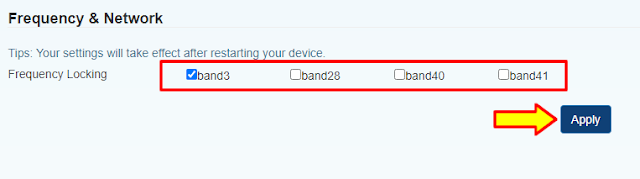
👉 Inside
Bands Locking, you will find there the
Frequency & Network available. In the
Frequency Locking, you will see there all the available bands like
band3,
band28,
band40, and
band41. Do not select all of the bands, just select and test one at a time. After checking all the bands, choose the one with the best signal. Press the
Apply button to save your band.
👉 Done!
Note: Your
SINR value should have at least 13 to 20,
RSRP(dBm) of -80 to -90, and
RSRQ(dB) of -9 to -15 for a quite good connection. You can see these values in the LTE Signal Status of your
192.168.254.254 page.


0 Comments
Please comment according to the post topic. Any links and off-topic comments will not be published. Thanks!